Some how I’ve managed to not read this article until now, but delighted its on line so I can make up for my error quickly.
Müller J. W. 2006, Crepusius and possible shipwrecks, Revue Belge de Numismatique, 152, pp. 15-21.
adventures in my head

Some how I’ve managed to not read this article until now, but delighted its on line so I can make up for my error quickly.
Müller J. W. 2006, Crepusius and possible shipwrecks, Revue Belge de Numismatique, 152, pp. 15-21.
Because I’m reading Ulrich’s book on Roman Woodworking I’m a little obsessed with representations these day. Bear with me, it might wear off. Or not. I like tools.
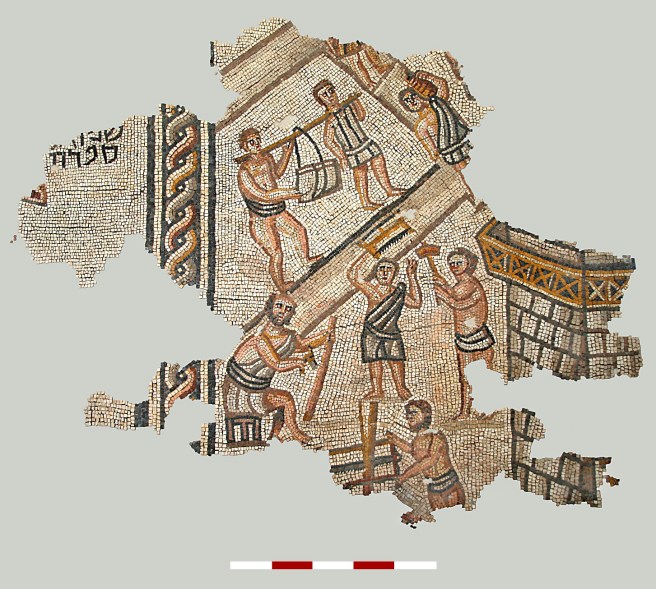
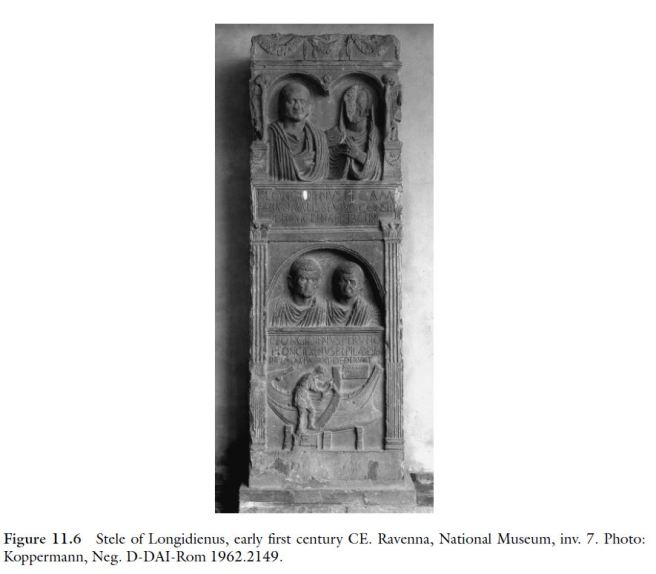
Anyway other than general awesomeness this mosaic caught my eye because of the log splitting frame saw at the very bottom. It reminded me of the log splitter in this relief.
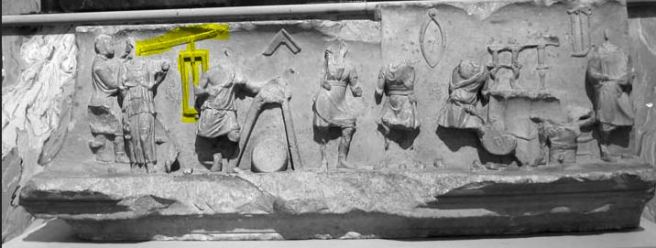
Perhaps the bar on top is to allow a single worker to operate the saw or to act as a guide to keep it straight or both?

Sometimes I see things that aren’t there, but even that can be interesting.
So I spotted this face on Nero’s shoulder here:
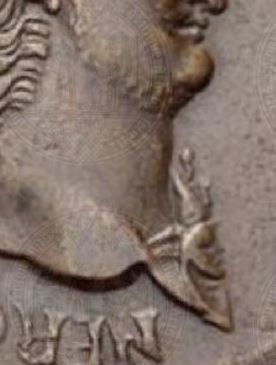
And What I “saw” was a face with an Pharonic style snake-y crown. This sort of thing.

And I thought wow that’s interesting, so of course I went to see other specimens. BUT first here’s the whole coin in trade:
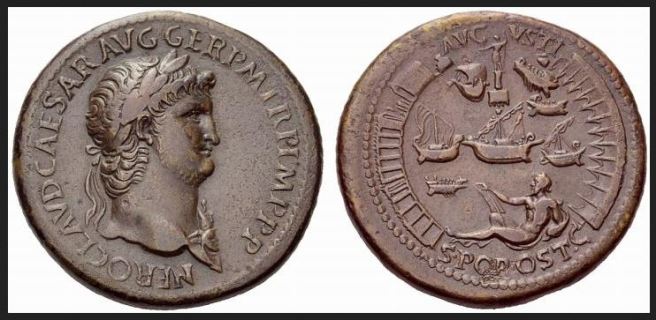


These other dies make it really clear that an aegis not something Egyptianizing is intended but I still like that little face on the shoulder in profile, a very nice representation of the aegis.
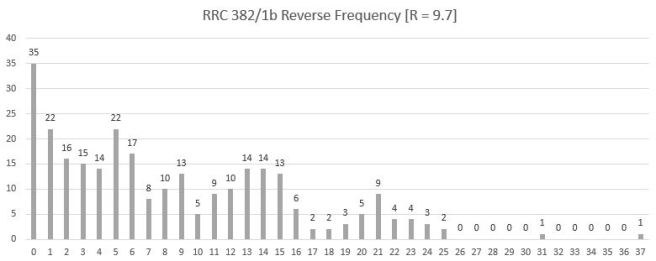
A group of colleagues read a piece of mine coming out in RBN 2020 and asked why I hadn’t given more data on Frequency. A really fair criticism as the Esty model I use relies heavily on assumptions about the shape of coin data. So I’m playing around with how to display that data this afternoon. Here’s our old favorite Crepusius (n = 3366; d = 437):

Here’s how he looked back in 1997 and 2011 when used by Esty:

But wait what’s going on!? Clearly our data sets don’t match. Esty is drawing on counts that I don’t (yet) have access to that were provided privately by Buttrey to Esty and never published! So somewhere out there are unpublished notes of Buttrey on observed specimens that would need to be reconciled with RRDP to get more accurate counts… That’s a pain.
Okay moving on to other issues I”ll be back with more frequencies momentarily.


Shortly there will be better photos of this coin more widely available after the release of the Witschonke collection images for the ANS. The obverse and the type of token is well summarized in a blog post by Clare Rowanwith references to further scholarship by Carbone, Stannard and others.
CNG listed the Reverse as a “Harrow (or miner’s axe?)”; The ANS presently has it as “Plow?” and another senior scholar assured me it was an axe. I’m not convinced.
I’ve been reading Ulrich’s Roman Woodworking and I think this tool is a far better fit with representations of the adze.
The adze is a planing type tool. This is an amazing discussion and collection of images. All the comparative images below are taken form this website. The thing to notice about the adze is how the handle curves towards the blade. Axe handles are typically straighter and longer.

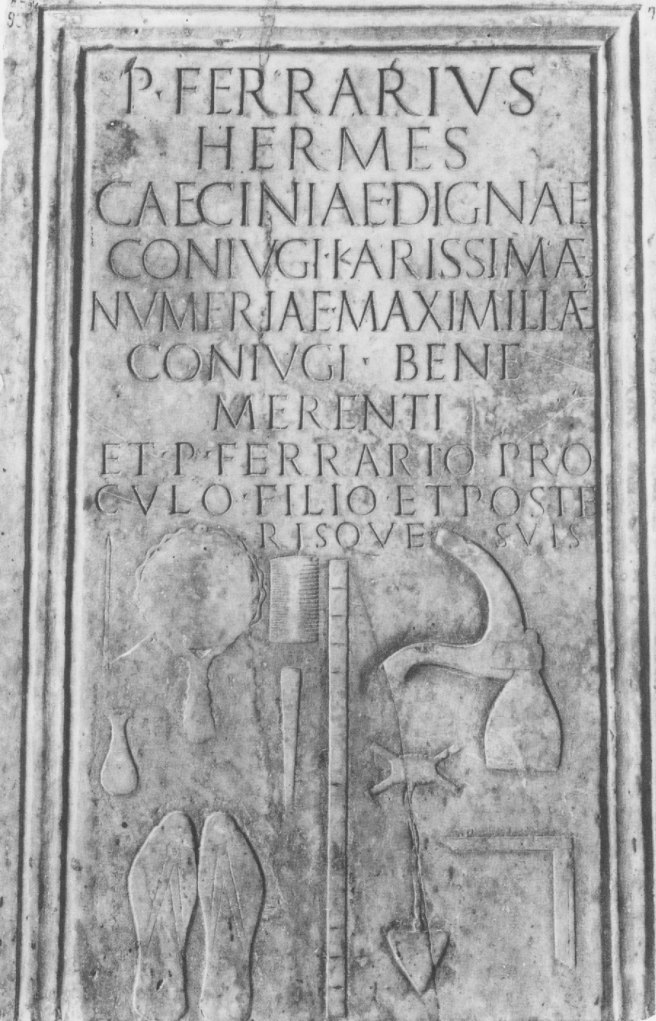
The objection to it being an adze rather than an axe is that the blade on the coin is than angle of the cutting blade to the handle. This is explained by Roman perspective and is seen in other representations of the adze. On the below tomb the wide blade is represented with the two handled grip, the artist has chosen to emphasize width over true profile. The photographer above has achieved the same effect by viewing angle.
The adze in operation is represented on the Telephos Frieze from the interior of the Great Altar of Zeus at Pergamon:
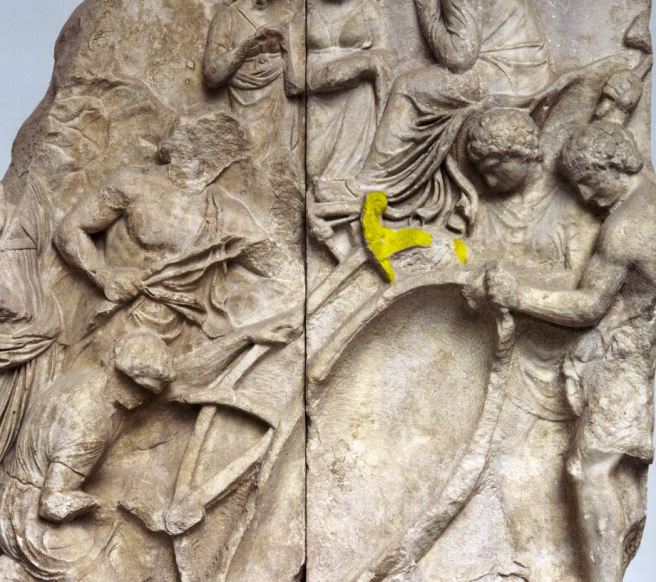
Ulrich was kind enough to write back and confirm in his opinion that it is most certainly an adze. He mentioned the representation under Icarus’ work bench on the Vettius fresco as another perspective drawing of a Roman adze.

Thinking more about the Telephos frieze … I got wondering if the Adze might be symbolic of boat builders generally. Perhaps!

Egyptian boat building scene 7th century BCE (Brooklyn Museum)

Adze and boat building further example (added 8.4.20):
Said to be from Chiusi

This morning I am desperate to read this article and have written to one of the authors hoping for a PDF. (If you have one do send it along PLEEEEASSSSSEEEEE). I now have a copy and am reading!
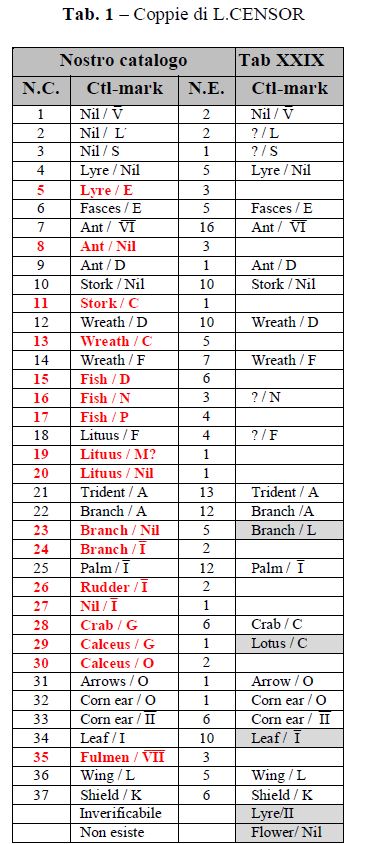
Debernardi, Campana, Lippi, Passehl, I DENARI DI L.CENSOR CON SIMBOLI/LETTERE (RRC 363/1a-c), Monete Antiche Nov.Dic. 2018, pp. 25-47.
While trying to see if I could find a PDF on-line, I did find this very interesting blog post. Because things sometimes disappear online and I really don’t want to lose this information, I’m going to fully quote it on this blog to create my own permanent archive.
Update. The final published table is a little different than that from the blog:
The most important results of the paper are therefore:
In this way, the few dies of L.CENSOR with symbols finds a reasonable framework for the first time: they were the first dies produced after the fire, to test a new system of control-marks, thereafter immediately applied to RRC 360/1 and, exactly in the same way, in the Crepusius coinage. In fact, Crepusius re-uses most of the symbols of Censor, and combine them with letters and numerals, all ingredient present in “Censor’s experiment”. This is the most reasonable way to understand the otherwise inexplicable mixture of combinations that RRC tries to describe with its 1a/1b/1c. In fact, this is a single production, and to split it into free parts is rather a stretch, inasmuch as all of the dies are linked together. The four unsigned dies (Nil) of Censor that survived the fire were mixed with twenty or so dies with symbols/letters. The aim was to mark the dies so that to have a better control on them, now placed in a less secure temporary mint. That experiment ended RRC 363/1 and precisely date “our coins” to the first half of July 83 BC. Then RRC 360/1 followed, expressing the mourning for the big Capitol fire and also the need of giving a collegial certification of the restarted mint production by all the three moneyers. After a month or so, it was stopped and Crepusius started to mint his coinage, exploiting in full the experience acquired by Censor’s experiment.
Among the coins presented here, many are not listed in RRC’s Table XXIX (Pair Number 5, 13, 15, 17, 23, 35 offered for the first time in a public sale) and some are not in any public collections: PN 23 is only in Paris and in such poor condition that it led Crawford astray.


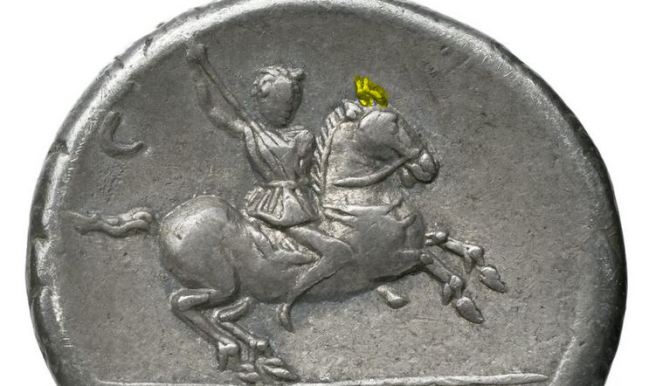
As those of you who follow this blog know–I really appreciate it, even if I find the fact that anyone other that I enjoys it deeply bemusing–I’ve thought that the ride on RRC 361/1 was Alexander the Great for a while. I spotted a BnF specimen today while checking presumed singletons in RRDP/Buttrey that I feel confirms my hunch.
This horse has horns!

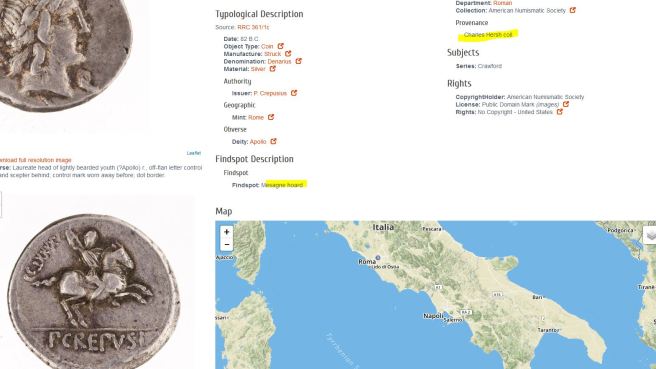
A v nice tech friend helped me transform a .geojson file into a .json file that could be uploaded to AWMC à-la-carte
Above is a nice clear plotting that resulted. Also resulted in an interesting twitter thread about how digital resources end up orphaned and issues about compatibility as new protocols come online.
